
There are many hosting providers in internet. Bluehost is one of the best one for Wordpress hosting. Actually wordpress recommended you to host on Bluehost when you are creating your website in this platform. So, it is better to host a new blog on Bluehost. Moreover, if you buy hosting in Bluehost, you’ll get a free top level domain for your blog. For this, you may be charged about 5$/month. Just click on the following image to get limited time discount.

Recommanded: How to buy Domain and Hosting
If you’re a fresher in blogging, I know this it is quite hard to buy without seeing before this process. In this case, I recommend you just to follow the below steps. Before that buy a package first.
• Sign Up for BlueHost
Now I'm going to show the WordPress installing process in Bluehost.
See the whole process of "How to buy Domain and Hosting" in screenshots to perform this step properly.
If you want to have a look other hosting providers to buy their hosting with a great discount, click on the below link. For the new year 2017, these companies offer you a special discount. Just choose the one you like.
Recommanded: Cheap Web Hosting for 2017
How to Install Wordpress
Let’s start the installing process.
- First login to your Bluehost account and go to cPanel. cPanel means control panel. Here you should mind that you need a Bluehost account to login. Because a bluehost account is must at the time of buying a domain and hosting. When you go to create an account in bluehost, you must have a credit card. But as a newcomer, you may not have a credit card. It’s very simple. In this case, you can borrow a credit card from others or you can buy hosting using others exist account. But credit card or having PayPal account is must for creating account cause you’ve to pay the bill online when you’ll buy services from the provider.

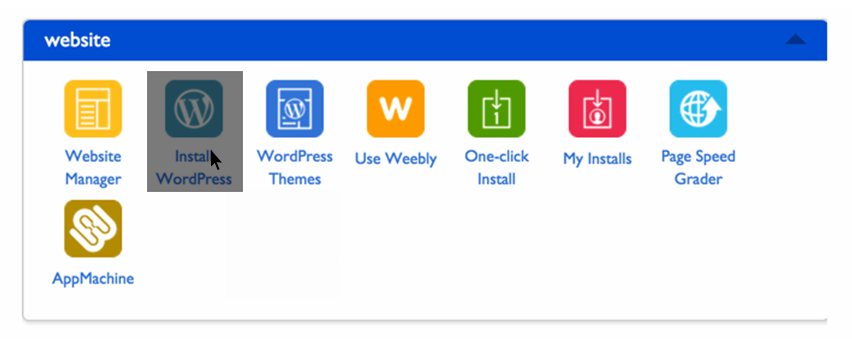
- At the end section of cPanel, you’ll find “Install WordPress” option. Click on this and a new window will appear in front of you.
- Click on “Install” and the next window will open. In this window, you will be asked to choose the domain. Select your domain and click on “Check domain” to make sure the provider about your domain. If you click on the scroll down symbol, you will find www.yourdomain.com and http://yourdomain.com to choose one. Select which you like and click on “Check domain” option.


- A new window will open and you’ll find some more settings. This is advanced settings and your last step also to install.
- Here, you’ve to setup your admin username and admin password. You shouldn’t write admin in the username and keep the mark on “Automatically create a new database for this installation”. Then click on “Install Now” to start the installation.

- Installation process will start and don’t close the page till the completion of the installing process. It can take a few while.

- After the end of the competition process, a new email will be sent to the registered email. In this email, you will get the username and password to login to the WordPress dashboard.
Yess! You’ve done all the task of installing process. Now login to your WordPress dashboard to setup essential settings after installation. To see the whole process of these settings, click on the following topic.
Recommanded: Essential primary plugins of Wordpress
Thanks for reading the article. Please share this article on Facebook, Twitter or Google+ if you get any single line of knowledge or information here.


No comments:
Post a Comment