A Free custom domain email will be given by the hosting provider according to your custom domain at the time of buying it. It’s your site’s email which can be used to connect with your site’s subscribers. So, it plays an important role to get your site rank by helping. But you have to use it in free email service platforms like Gmail, Outlook etc. So before start using, you have to link this free custom domain email with any free email. Today, I am going to show you the whole process step by step.
#How To Send Mail From Free Custom Domain Email
1. First, Login to your "cPanel".
2. Click on “Email Accounts” from the dashboard.
3. Choose username in the first blank bar and choose a password in the next two. Then click on “Create Account”. Yes! Your custom email has been created.
 |
4. Login to your Gmail account in which you want to setup your custom domain email address. Actually, we are going to create another mail service in this Gmail to send and receive mail .
5. Go to the top-right and click on “Settings” icon, some options will appear. From these, click again on “Settings”.
6. Then click on “Accounts and Import” from the tab bar.
7. From this window, click on “ Add a mail account”.
8. A pop-up window will open containing a blank bar in the middle. Here you have to type your custom domain email address. And, then click on “Next step”.
9. A new window will appear again. In this window, your custom domain email address which you’ve created a few minutes ago, input in the “Username” area and custom domain email password in the “Password” area. Input the hosting homepage URL ( follow this format: www.hostinghompage.com) in the “POP Server area”. Then, check the boxes like following screenshot and click on “Add account”. Here mind it, if you choose SSL security option placed in below, you have to choose port 465. Otherwise, choose the other.
10. A confirmation window will open containing two option. Choose the first option to be able to send mail from this mail. You have to do this cause you are able to receive mail only at this moment. So perform the next step to be able to send mail. After choosing the first option, click on “Next step” to go ahead.
11. Here, type the name what you want to see as sender.
12. A new window will appear like the above one. In this window, type the same URL what you entered into the previous window like this. Of course, same format. And the other options, fill out the same information. That means, enter custom domain email and email password. Here remind that, if you choose SSL security option placed in below, you have to choose port 465. Otherwise, choose the other. After filling out all the information, click on “Add account”.
13. A confirmation code requesting window will be appeared like the below. You can close this window. Mind here, your account is not confirmed yet.
14. To confirm your account, go the cPanal dashboard and Click on “Email Accounts” once again.
15. Click on “More” from the right down of the page. Three options will appear, you have to choose “Access Webmail”.
16. Click on the “Roundcube” option.
17. Incoming emails will open. See here, a new email has been reached. Click on this to open.
18. After opening the email click on the activation link.
20. You’ll see the confirmation link again and click on it to execute the whole steps.
21. A new window will be opened. Click on "Confirm".
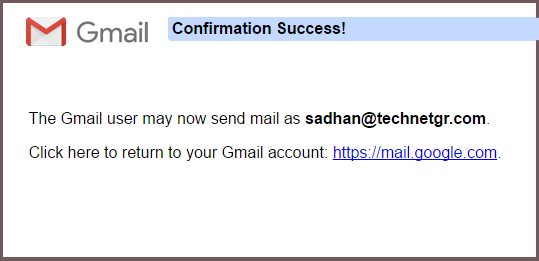
22. You'll be seen the "Confirmation success" message at the end.
Yes! You have done all the tasks perfectly. Your custom email is ready to send and receive mail. Here mind, when you are going to send an email, you have to select your custom email like the below screenshot.


No comments:
Post a Comment